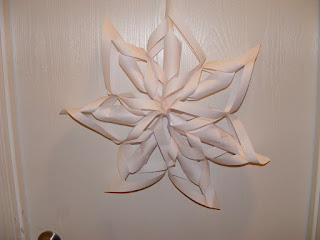
I am going to teach you how to make one:
Here is a Step by Step
Things you will Need:
6 Pieces of PapersScissors
Tape
Stappler
Step One: Fold Paper
Step Two: Cut
Step Three: Fold in Half
Step Four: Make Three Cuts Across..Please make sure the the corner is in your hand, this is important then you cut at the top and make Three cuts, Leave room at the top of the cut so that you don't cut all the way. if you do then you will have to start over from Step one.
( I missed up here, so I only have pictures for two cuts, but you do Three)
Step Five: unfold and have the paper lay on the table with the mibble pointing up.
Step Six: Take the middle two and attach them together with tape ( see picture)
Step Seven: Flip over and repeat.
Step Eight: Flip and repeat, repeat this step until all are connected.
This is what it looks like
Step Ten: Make 6, then attach them together ( see picture) with Stappler
Step Eleven: Use Stappler to attach in between the snowflakes (see picture)
This is the Finished Project!
You can also use scrapebook paper, wrapping paper, mostly any
paper that you have.


3 comments:
They are so pretty, I love them
Wow, thank you for sharing. This is very pretty and interesting. In case you have not received my other comment, thanks again for stopping by my blog. You have a great blog site with great background graphics and contents.
Happy New Year!
Wow, I will try to remember this for next year. Great blog banner btw. Lx
Post a Comment